Tile Installation Guides
The distinctive, handcrafted nature of Heath tile is beautiful, but it does take careful installation.
The following guides will help you in your planning and installation in general, and in working with specific patterns. Please read these carefully, ask your Tile Specialist any questions you may have, and keep these on hand during the installation process.


Installing Your Tile
You have your tile, and are ready to install (hooray!). Here are few but very important items for you to consider to ensure your installation looks its very best.
Inspect and Sort
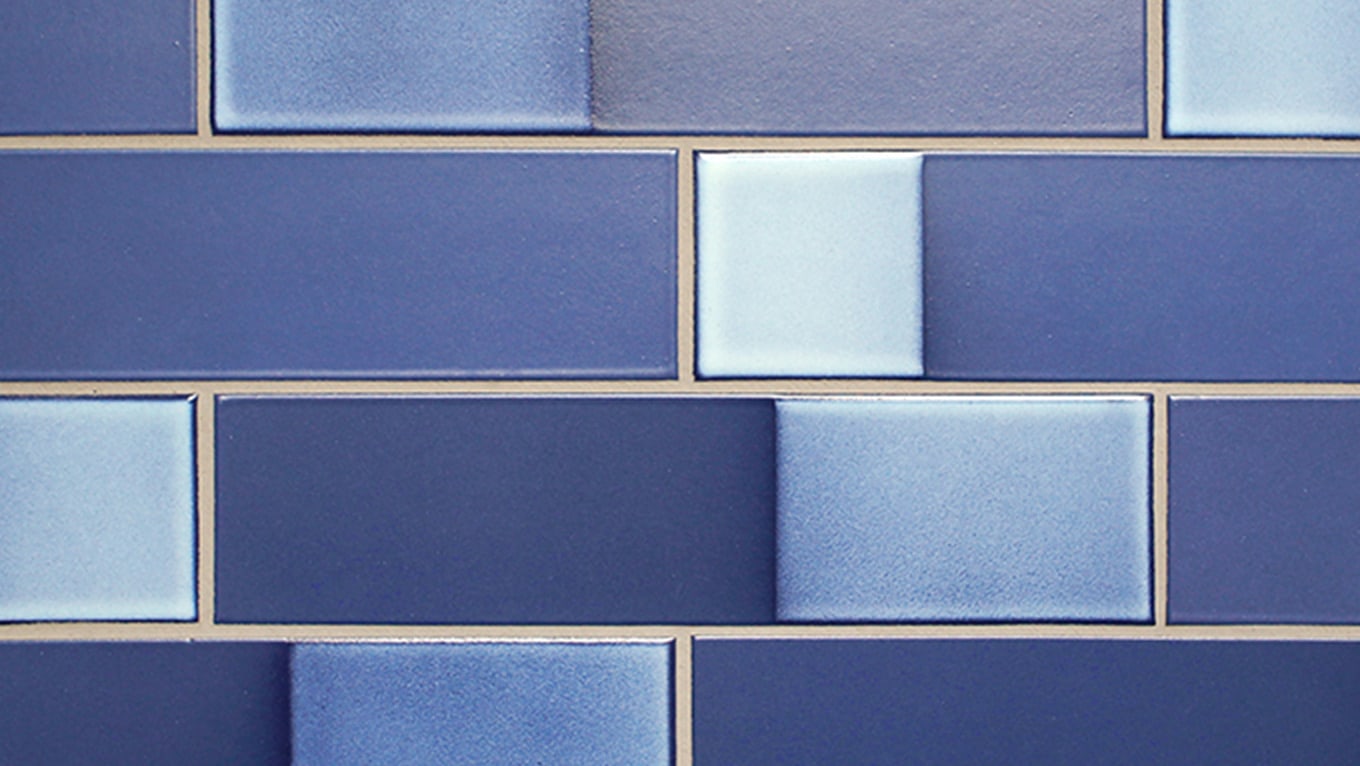
Once you’ve planned your installation, carefully inspect AND SORT the tile you’re working with (do this with all boxes). Heath Tile is designed to be perfectly imperfect (within defined tolerances) in glaze, size, and curvature. It’s imperative to understand the nature of the variation in your particular tile order:
– Inspect all of the tile in good light, and put aside pieces that really stand out.
– Sort the tile into at least 3 piles (and up to 5 piles for higher variation glazes) by groups of color, darkness, and lightness. Pull from them in equal rate to create a consistently blended surface.
– Tiles should also be sorted based on their length and direction of bowing, especially on longer tiles and dimensional shapes. Some shapes and sizes have more curvature than others.
Layout
Lay out the tile in advance in good light to help the eye to pick up subtle variation. (Especially recommended when working with white glazes.) In general, the goal will be to get an even blend, and not large concentrations of color or tone. Examine the layout from both near and far.
Grout
Choose the right grout width. We recommend a minimum 1/8" grout line for smaller sizes, minimum 3/16"–1/4” for medium to large sizes. (See below for specific recommendations.) In some cases, an even wider grout line may be necessary to achieve the best overall look depending on specific tile characteristics and installation.
Wider grout lines give flexibility to adjust for natural size variations and curvature, and can coax the eye into registering straighter lines. A larger installation/area of tile allows for flexibility in your grout spacing.
Don't rely on one size spacers; shimming will help maintain level lines and create a balanced look throughout the installation.
We recommend using sanded grout formulated for 1/8” to 1/4” spacing. Some sanded grout may contain large/sharp aggregate that can scratch tile. If you’re grouting glossy tiles, we recommend testing the grout prior to grouting your installation. Every bag can be unique, so if your installation requires multiple bags, please test each bag. Follow the manufacturer’s instructions for mixing and applying grout.
Setting
Use Thinset, Mortar, or Mastic, depending on site underlayment requirements. (Keep in mind that mastic is more forgiving than thinset for moving things around.). If the tile is not flat, use a thicker layer of thinset to build up the tile. Review the installation, making any additional adjustments for color/size before grouting.
Pre-Seal and Pre-Grout
Refer to our Tile Specifications Booklet (PDF) for pre-grout seal recommendations by glaze. Test grout in an inconspicuous area before installation for color and aggregate mix.
Pro-Grout
Take out spacers on a daily basis (after setting). Make sure to clean off extra thin-set and grout along the way before it hardens too much! Grout haze should be cleaned off the surface of the tile immediately.
Face-Mounted Tile
Mounted material is blended in the factory, with modules intended to “assist” successful installation. Color variation and module blending will require cutting through tape and adjustment of individual pieces of tile. Refer to your tile pattern instructions for more detail.
Once face mounting has been removed, re-evaluate the overall module layout, variation and grout spacing, and make any required adjustments before grouting.
Recommended Grout Spacing
1/8" Minimum recommended grout
2x2, 3x3, 1x3, 3.5" hex, little diamond, half hex, wide hex
3/16" minimum recommended grout
2x4, 2x6, 2x8, 2x9, 3x6, 3x9, 4x4, 4x8, 6x6, 5" hex, 4" right triangle, bowtie, oval, diamond, dimensional triangle
1/4" minimum recommended grout
2x12, 3x12, 6x12, crease in, crease out
Looking for Something Else?
Just starting your design? Review our Tile Design Basics.
Want to dive deeper into tile? Review our Technical Resource Library.
Have other tile questions? Read our Tile FAQ.
Ready to start an order? Contact a Tile Specialist for assistance.


Contact Us
Send us a note to let us know how we can help with your project.
We also have tile showrooms in Sausalito, Los Angeles, and San Francisco if you want to see the product firsthand.